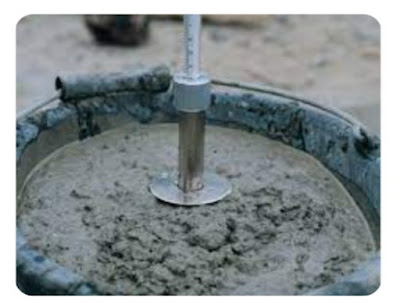
K Slump Test of concrete | Workability of Concrete Test
Hello friends, today in this post you will learn about the K-Slump Test of concrete, Workability of Concrete & detail stepwise procedure.
So, don't skip to read the post completely. After reading the post, you will completely understand the simple tests of the Compression test on concrete cubes.
So, let's start with these amazing topic...
K Slump Test of Concrete:-
Workability of concrete is a most important & complex property of Concrete.
To make an excellent workable concrete, there are some factors involves.
Determination of workability of concrete is huge task for civil engineers.
This involves lengthy calculations. To find this, researchers found, tests which give accurate results on the workability of concrete.
The slump test is mostly used to determine the Workability of concrete. But testing the sample batch to batch with Slump test takes more time & also require more effort.
To reduce these efforts & time, researchers found a new & modern test which gives a precise & accurate slump value of concrete name as " the K-Slump tester".
K Slump test is first covered by ASTM C 1362 .
This test is also used to determine the workability of concrete as well as the degree of compaction of fresh concrete.
This test was an instant & direct test, from which we can easily determine the slump value in one minute.
In this, it have a tester which is inserted in fresh concrete to measure the slump value of concrete.
K slump test is very helpful for finding the relative workability of concrete.
Apparatus of K Slump Test :
The K slump tester is made up from chrome plated steel, Aluminium, and plastic.
Also it having a upper part which is made of Plastic serveing as a handle as well as the lower part made of the chrome plated steel tube is used for testing.
The lower part of K slump tester:
The round chrome plated steel is hollow and has an external dia of the 1.9 cm and internal diameter of 1.6cm.
The length of the tube is 25 cm, as well as it also includes the solid cone at the bottom which facilitates inserting the tube into the fresh concrete.
The lower part of the steel tube is also provided with two types of openings.
It also having a 4 Rectangular slots of 5.1 cm long and 0.8 cm wide. 22 round holes of 0.64 cm.
As exhibiting 22 holes in the diagram isn’t possible so, we have been depicted it with 8 holes.
Middle part of K Slump Tester:
The disc floater of dia 6 cm as well as which having an thickness 0.24 cm which helps to divides the tube into two parts.
The disc can be used to prevent the k slump tester from sinking into the fresh concrete which exceeding the preselected level.
Upper part of K Slump tester:
The upper part of the tester has a hollow plastic tube of dia 6 cm, also having a 0.24 cm thickness.
It is graduated with centimetre scale as well as the bottom portion of tube has the aluminium cap 3 cm diameter also having 2.25 cm long.
Along with this, it having a little hole, but also they have a screw that can be used to set. To make an adjustment, take the reference zero of the apparatus.
The Hollow plastic rod can move freely inside the chrome plated tube through the disc.
The rod is also provided with the small pin which is used to support the measuring tube at the beginning of the test.
We have to Remember that both tubes are hollow.
Procedure of K Slump Test :
1. Before starting the test, Wet the tester and clean it with a cloth.
2. After that, we have to Raise the plastic tube let it sit on the pin support.
3. Now, Take a container & pour some fresh concrete and level it.
4. In this step, we have to insert the k slump tester vertically down until the disc floater rests at the surface of the concrete. Care should be taken that, we don't have to rotate while inserting the K slump tester.
5. We have to Wait for 60 seconds, lower the measuring rod slowly until it rests on the surface of the concrete.
6. After that we have to entered the tube , we have to also to read the slump value directly on the scale of the measuring rod.
7. Remove the tester from the fresh concrete vertically up don’t rotate or shake while removing the rod from the concrete.
8. Due to the presence of holes at the bottom part of tester the concrete flows into the K slump tester.
9. Again lower the measuring rod slowly till it touches the surface of the concrete retained in the tube.
10. After that, we have to read workability directly on the scale of the measuring rod.
For reference, take reference of below video for easy understanding :


0 Comments